|
Grade 11 Genetics Focus Question: Why do you look the way you do? Diagnostic: Begin by asking students to answer these questions independently, then discuss in groups.
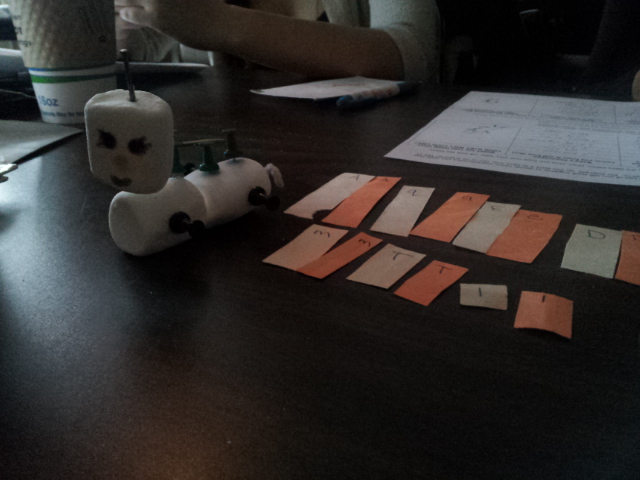
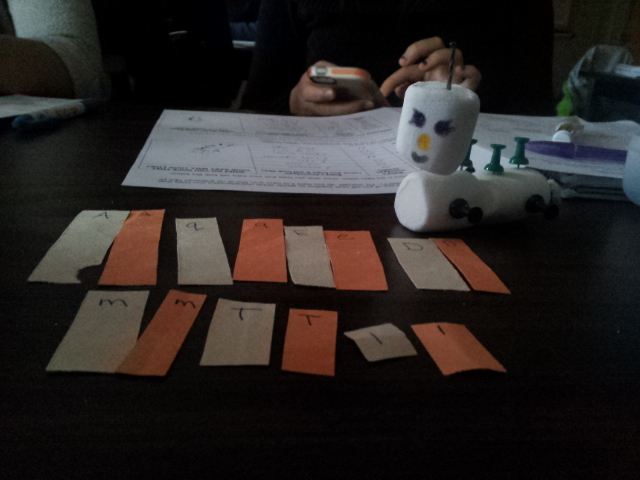
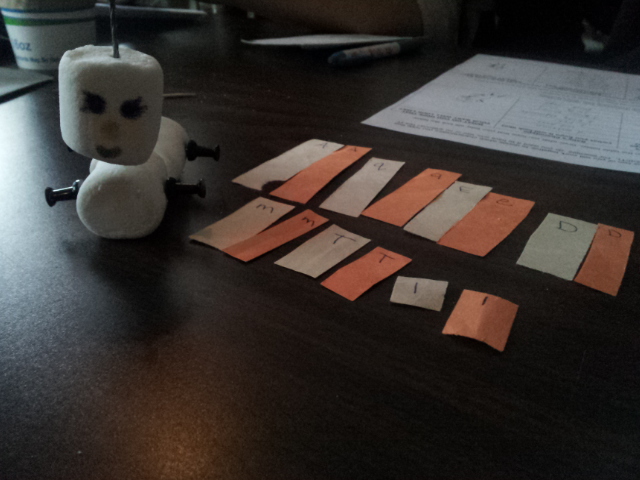
Encourage students to share their ideas (snowball activity, think-pair-share, placemat...etc.) and allow students to keep adding to this as they learn more about genetics throughout the unit. Grouping: Ask students to pair up. Give each pair an envelope containing a set of pre-made "chromosomes" for either a father or mother. Ask students to make a group of four with another pair who has a parent of the opposite sex. Learning Activity: Reebop Babies Materials: - Envelopes - Colored Construction Paper (for chromosomes) - Colored pencils or markers - Large Marshmellows ("body segments") - Push Pins ("humps") - Pip-cleaners ("Tails" - Small iron nails ("Antennas") 1. Tell students that they have received an envelope with the "code" in it for a reebop parent. Ask students to lay out the pairs of chromosomes (each set of chromosomes will be one color) from largest to smallest. Give them a copy of the key/legend so they can determine the genotype (code) and phenotype (what it actually looks like) of the parents. 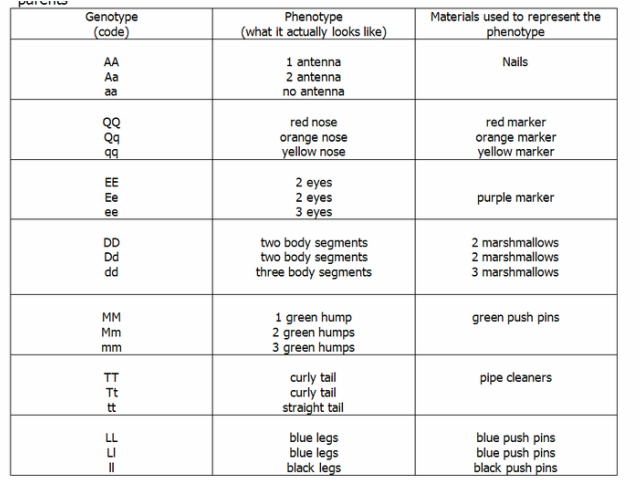 2. Have students fill out a chart with headings for phenotype and genotype, and get them to draw what their parent looks like. 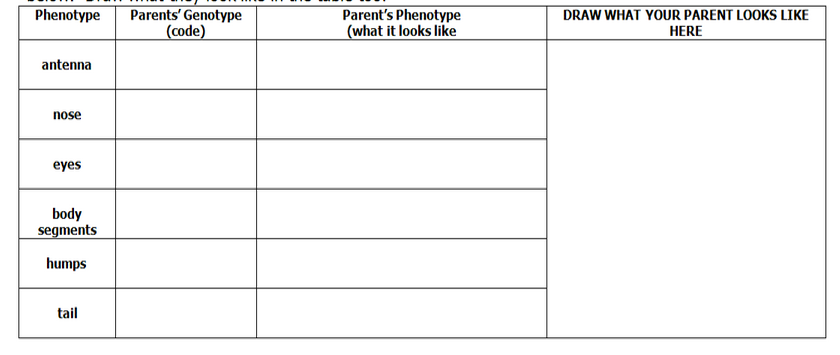 3. Students predict what their baby will look like based on the genotypes and phenotypes of the parents.
4. Once predictions have been made, the two pairs of students randomly pull out chromosomes from the "dad" and "mom" envelopes until they have a full set required to build the baby. 5. Build the baby with the materials provided! Why I like this activity: Reebop babies are a fun hands-on, exploratory activity that can be used to introduce students to the genetics unit in grade 11 biology. You can start the unit with this lesson by using the appropriate terminology (chromosomes, genotype, phenotype...etc.) without having to explain what each of those terms mean. Just be sure to give students enough information either on the hand-outs, or through visual cues (e.g. the envelop containing construction paper "chromosomes") so they have enough working knowledge to complete the required activities. This same activity can used to introduce concepts later on in the unit such as errors in meiosis, punnett squares, dominance...etc. Original lesson idea by Dr. Cathy Christie.
0 Comments
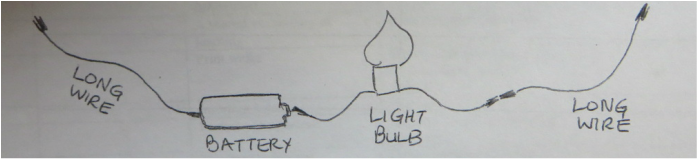
Last week's student-led workshop was presented by a group of students in our biology curriculum class. Their workshop was focused on the grade 9 electricity unit. Here, I have described each of the activities in detail, made note of possible debrief/scaffolding questions you can ask students, and some of my annotations on how the activities can be improved. Focus Question: "How do we prevent an electrical shock?" Introduction: Give one blank sheet of paper to each group of four. Get students to draw a light-bulb on the center of their page. Assign one student as the "recorder" and ask the group to brainstorm words or phrases that come to mind when they think of the word "electricity." Learning Activity: Turn the Light On! Materials: -wires (stripped at both ends) -Christmas lights -AA batteries -electrical tape PART A- Teacher Instructions: Ask one student in the group to collect 1 wire, 1 AA battery, 1 Christmas light, and electrical tape. The students' task is simply to "turn the light on." Debrief Questions: What components do we need to create a circuit? (load, wires, power source) PART B- Teacher Instructions: Now ask one student in each group to get one extra wire and one additional light bulb for their group. Instruct students to try and turn both lights on using different wiring strategies. Have students draw each of the circuits they create in their notebooks. Go around and assist students as they go through the activity. Ideally, you should have students building both parallel and series circuits. Designate one or two people to draw the two types of circuits on the board. Debrief Questions: Explain to the students that they have just built series and parallel circuits. What observations can you make about each type of circuit? Which one do you think is series and which is parallel? Why? Follow-up: Proceed by showing students a string of Christmas lights. Ask them to predict what they think will happen when one light bulb is removed from the middle. Record students' predictions on the board, and host a secret vote of science to determine the most popular choice. (Extension: ask students to explain their choices, e.g. "Why might something think the lights will get brighter? Dimmer? ...etc.). Turn off the lights for dramatic effect. Pull one bulb out of the string of lights and the lights all go out. Ask students to see if they can figure out whether the Christmas lights were wired in series or parallel. See if they can use the materials they have and the diagrams on the board to figure this out!  Electricity Quiz board. Terms on one column, and definitions in the other.  Board only lights up when correct match is made. 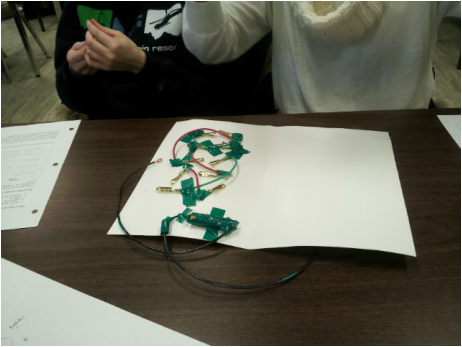 What the back looks like. Learning Activity: Electrical Quiz Board Materials: (per board) - 1 Poster board - 1 AA battery - Electrical tape - 10 Brass fasteners - 5 small electrical wires - 2 long electrical wires - Markers PART A- Teacher Instructions: Tell the class that you will be making an electrical quiz board to review the electricity terms of the semester. Students can pick 5 terms from a given list of terms, and they will be asked to go into their textbooks to look up the definition, and then write it down in their own words. These terms and definitions will be used in their quiz board. (Extension: give students a graphic organizer with three columns, with the terms on the first column, the textbook definition on the second column, and the paraphrased definition in the third column.) PART B- Student Instructions:
 "When students copy notes, they are reproducing a record of YOUR learning, not THEIRS." How do we create a learning experience that is meaningful?
Traditional classrooms often present students with the information they are expected to know, and students are expected to regurgitate that information on a test or final paper. Who is really doing the learning here? Psychotactics.com suggests that people can retain 90% of what they learn when they teach someone else or put the information to use immediately. What does this mean for our students? How much are they really learning from copying down notes from a blackboard? The way Catherine Christie from Queen's University puts it, "When students copy notes, they are reproducing a record of YOUR learning, not THEIRS." Explore First, Explain Later is a teaching method that first immerses students in a shared experience, like doing a lab, participating in a simulation, going out on a field study...etc., and the debriefing and/or note-taking part occurs after. Traditionally, students are given information on a topic and then asked to apply the skills they learned later. I'm not advocating for any one particular teaching method because I believe there is a time and place for everything (yes, even lectures). However, let me point out some of the benefits to the Explore First, Explain Later model. 1) Allow students the vocation of failure. Yes, tell them to take changes, make mistakes and get messy(!), because let's be real - we probably learned more from Magic School Bus than from a majority of our classroom lectures. 2) Create meaning. Authentic tasks and discovery-based learning allow students to tailor their learning experiences to their personal learning style. Students are likely to remember more from a concept where they create their own connections rather than from notes-based or lecture-based classes. 3) Sense of ownership over their own learning. Teachers exist to help learners learn, so why do we feel the need to be at the center of attention all the time? In this model of teaching and learning, teachers are seen as facilitators, and students play a central role in the learning process. Explain Later Once the Explore portion has been completed, the class gathers as a whole to explain and debrief the phenomenon they observed. In the beginning, the teacher is likely to take on a bigger role as guide; perhaps asking more questions or providing more support to the students. Instead of preparing a note for students to copy beforehand, the students' observations will dictate what notes they end up recording. Once the students have seen this type of learning modeled, they can direct the creation of their own notes while the teacher continues to monitor their progress. |
A Note from the Author
This blog documents some of the things I learned while I was in teacher's college at Queen's University in Kingston, Ontario back in 2015. Many of the ideas presented here are taken from my classes, professors, and fellow students. I do not take personal credit for the work presented here. 
Categories
All
Archives
May 2015
|
 RSS Feed
